
Little Dreams
Eighteen years ago I was lucky enough to spend two weeks on a residential course run by Micki Schloessingk. It turned out to be that most special kind of learning experience; the kind which keeps on teaching for years after.
The completeness of wood-firing and salt glazing has stayed with me, but it has not, until now, seemed like a realistic possibility for me. Recently I have been working, as part of a team, to restore an overgrown area of land into the old orchard it once was along with the diverse habitats for native wildlife which those old working methods, and modern conservation / land-management techniques encourage.
While digging to plant new fruit trees I found clay which, after some relatively gentle processing, proved to fire well to stoneware, (despite being quite iron rich) and produce a beautiful warm pink colour at earthenware temperatures. - And all of this got me thinking: might there be a way of making a very small wood kiln on this site? Could it be possible to hit cone 10 in 12hrs? Would a tiny chamber be able to retain stable heat and even allow for some of those magical effects of ash and salt?
For weeks now I have been drawing tiny sketches of possible kiln designs, researching the guiding principles of proportion and ratio which suit and, of course, also worrying about what type of Kiln-shed is best to build.


Cost is a primary concern in all of this. I am not keen to just thrown money at the project, especially given the very real probability that the kiln will never get to temperature, and the fact that the whole thing is not being built on land I own. Some of the cost savings will be through using second hand and reclaimed materials, and some through just doing the whole damn thing myself, and not having to pay for labour.
The other side of me wants to do the very best job I can: I want to give it the best chance of success that I can and, if it all works, I’d rather know that, having built it to last, I can enjoy using a sturdy kiln for several years to come.
With a couple of clear weeks in the diary, I broke ground on the site and… Immediately hit clay. I took this to be a good omen, but had to resist the temptation of delaying further in order to mine mud. The first hole yielded the same ochre coloured stuff as in the fruit-tree hole, and the second hole gleaned a very pale grey clay with ribbons of bright pink. Needless to say, I brought a fist full home to make a kiln-god from.
Having toyed with the idea of using scaffolding poles, fittings, and planks, for the kiln-shed, I have opted for a basic timber frame and a corrugated steel roof. - A more traditional design, and something which might seem a little more “at home” in the surroundings too.


Working on this muddy site during a rainy English winter is a little less than comfortable, so I have opted to cut as much of the timber and joints in the dry of the workshop before taking it all to site for the final construction. This all relies on good planning and careful calculations (not things I am famed for), and it also required transporting several hundred kilograms of sand, timber, gravel, blocks, and cement to the site. Our newly purchased second-hand car was going to get her mud-christening along the tracks leading to the site and there was a very real possibility of getting stuck. Fortunately, we didn’t stall and, after a slippery crawl through waterlogged tracks, the construction could begin.


After bailing out rainwater from the post holes I set the first two posts, the shorter of the four, in a standard mix of 1:2:4 concrete… and then another 3 days of rain set in(!). This was going to be slow, but it forced me to attend to some of the other projects which I had been neglecting. Call me egotistical, or just nostalgic, but I couldn’t resist scrawling my initials and the year into the wet concrete of one of the post-holes (yes, my middle initial is ‘W’…I will leave you guessing).
Gale-force winds were the next obstacle, but the corrugated steel sheeting is finally on, and the waterlogged ground can have some respite from the rain. I cut the last roofing sheet to make a thin (but full length) section which will cover the chimney hole. - The last length of the stack will be a removable section of stove-enameled chimney flue, so the hole in the tin roof will need to be covered when I am not firing.


Building the shed nestled into this corner affords some shelter from high winds thanks to the nearby trees. It also brings a sloping ground level so, by layering up 1:6 mortar (cement:sharp sand) and paving slabs I was able to create small pad foundations for each of the table legs.


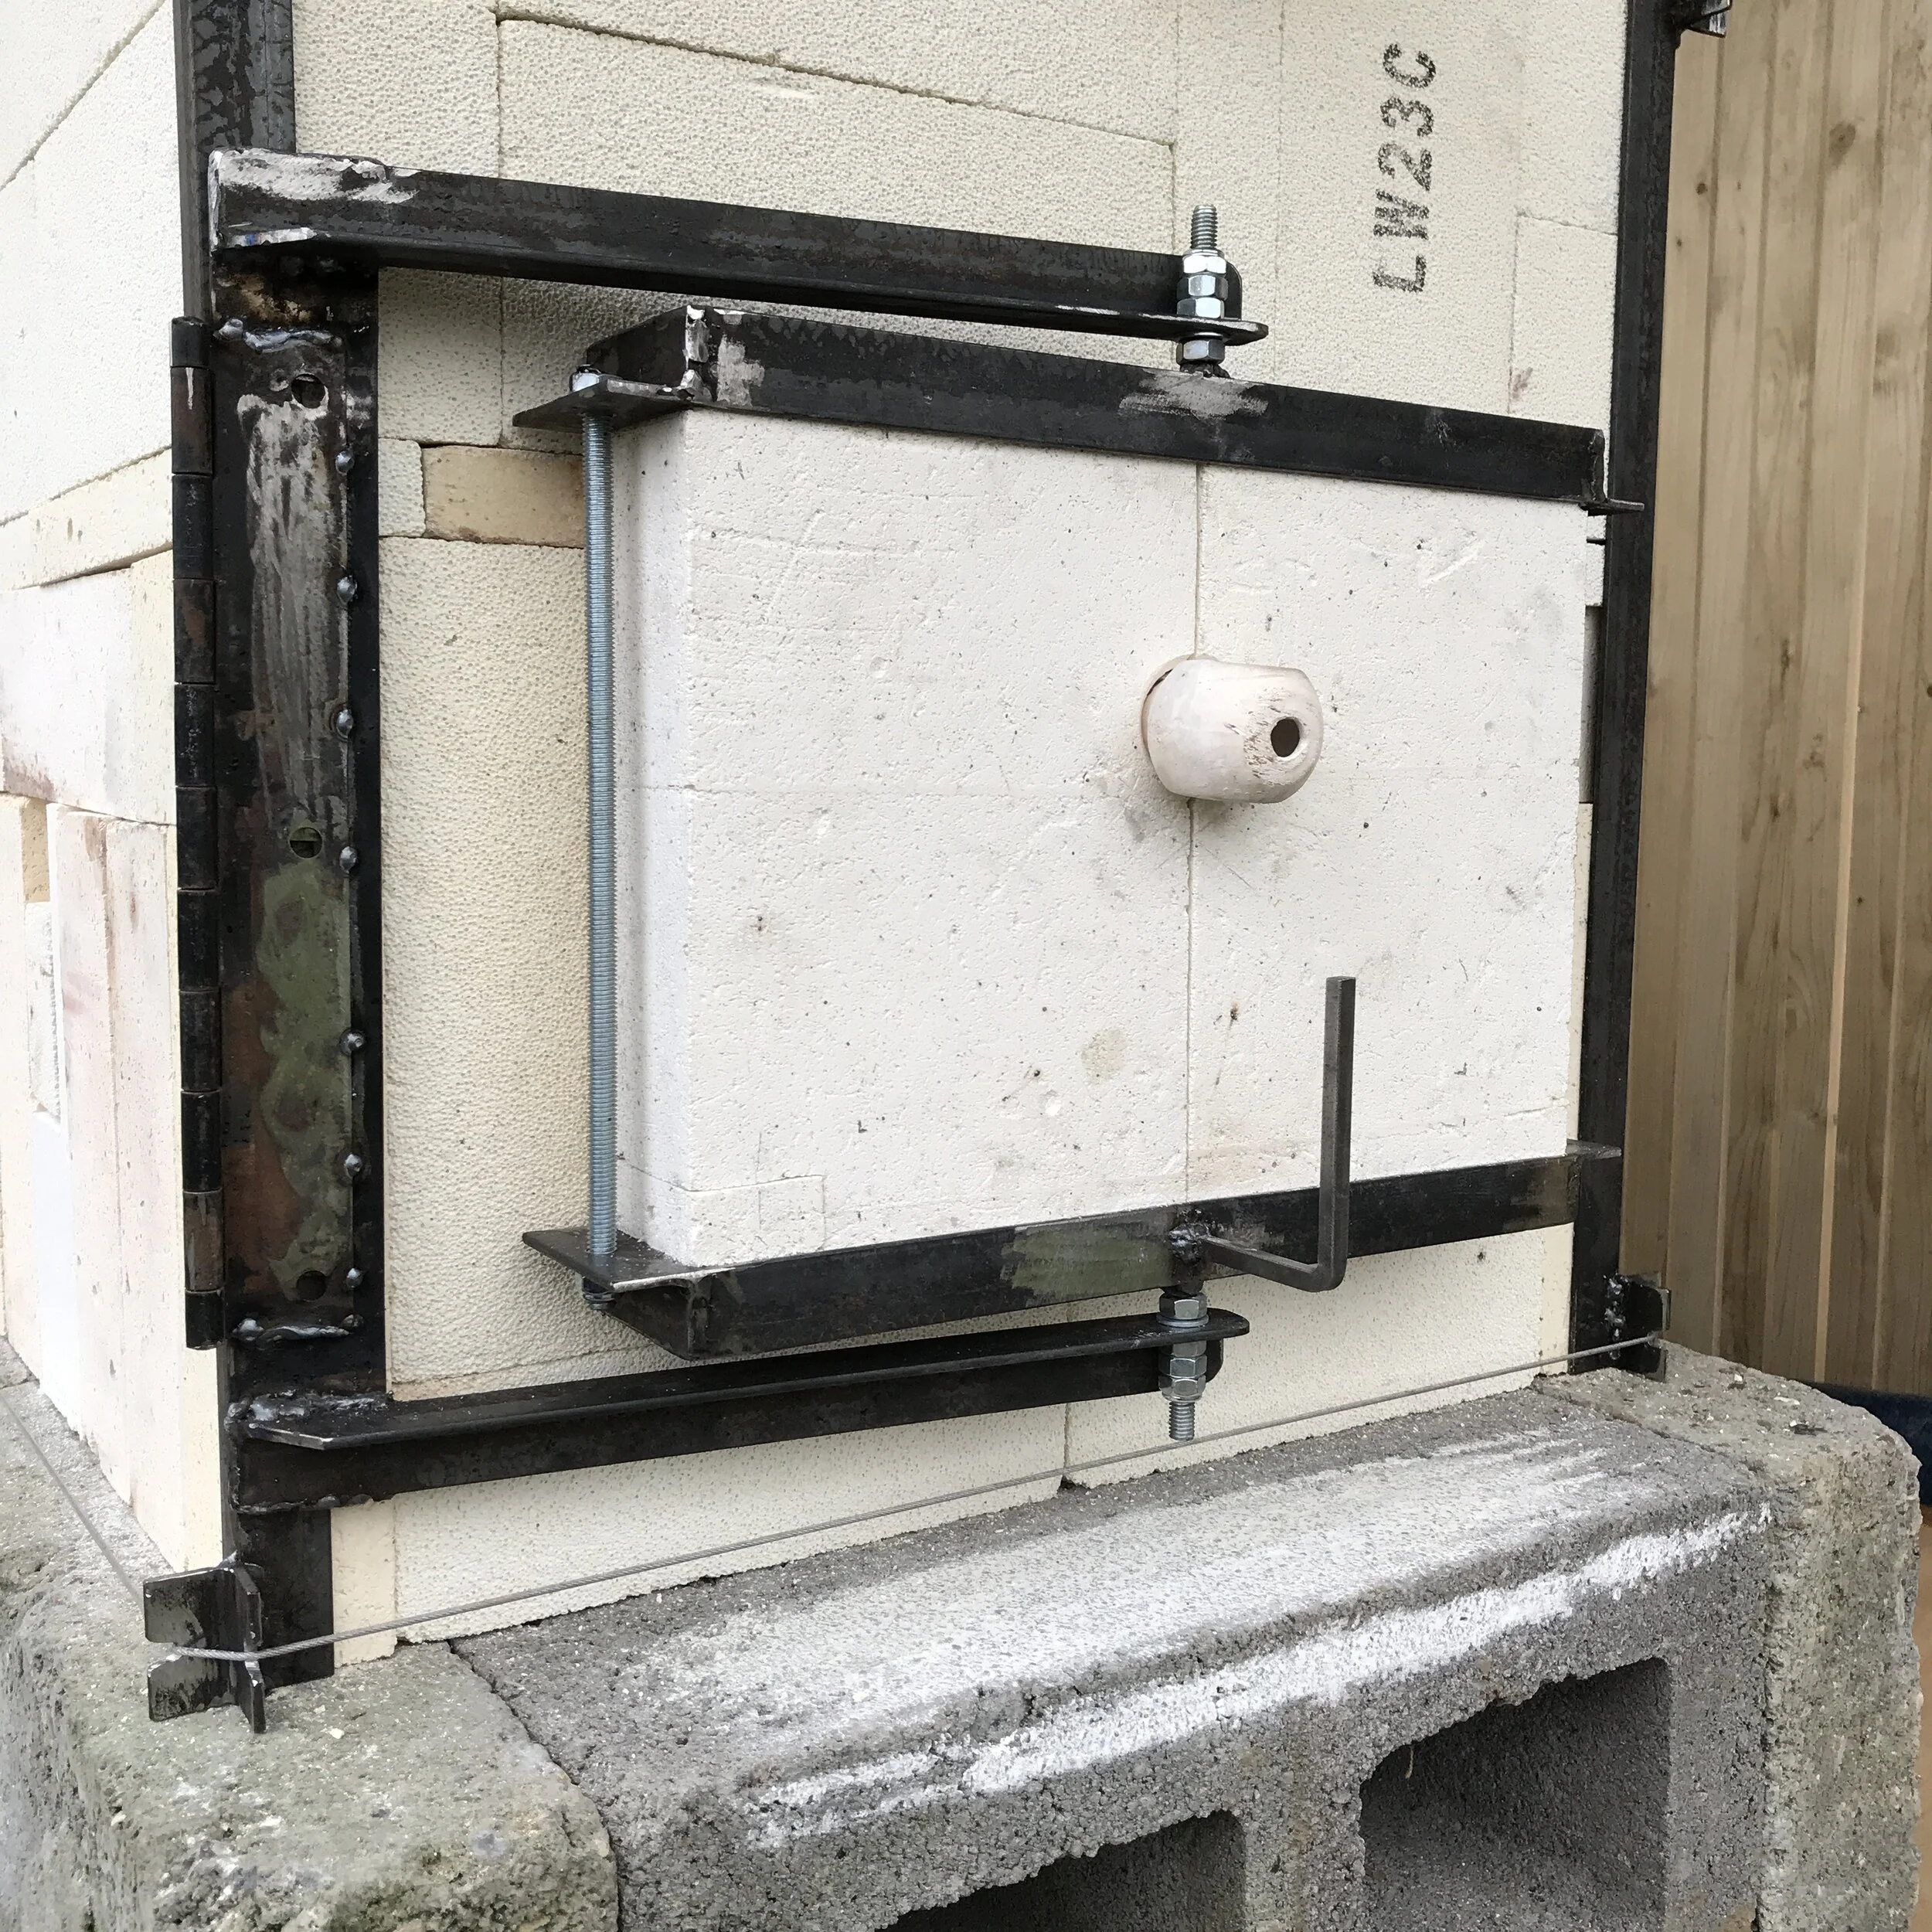
And so, with the table in place, the (huge) dream of building a ‘little’ kiln begins. Today, 8th November 2020, I laid the concrete blocks which form the base of the kiln (!).


Please tune in to the next blog post to learn more about the micro-kiln design, and the decisions behind it!