
Raku Kiln
Raku is not really part of my own creative practice, but it’s such an immediate, dynamic, elemental process that it seems an essential component to the teaching of ceramics.
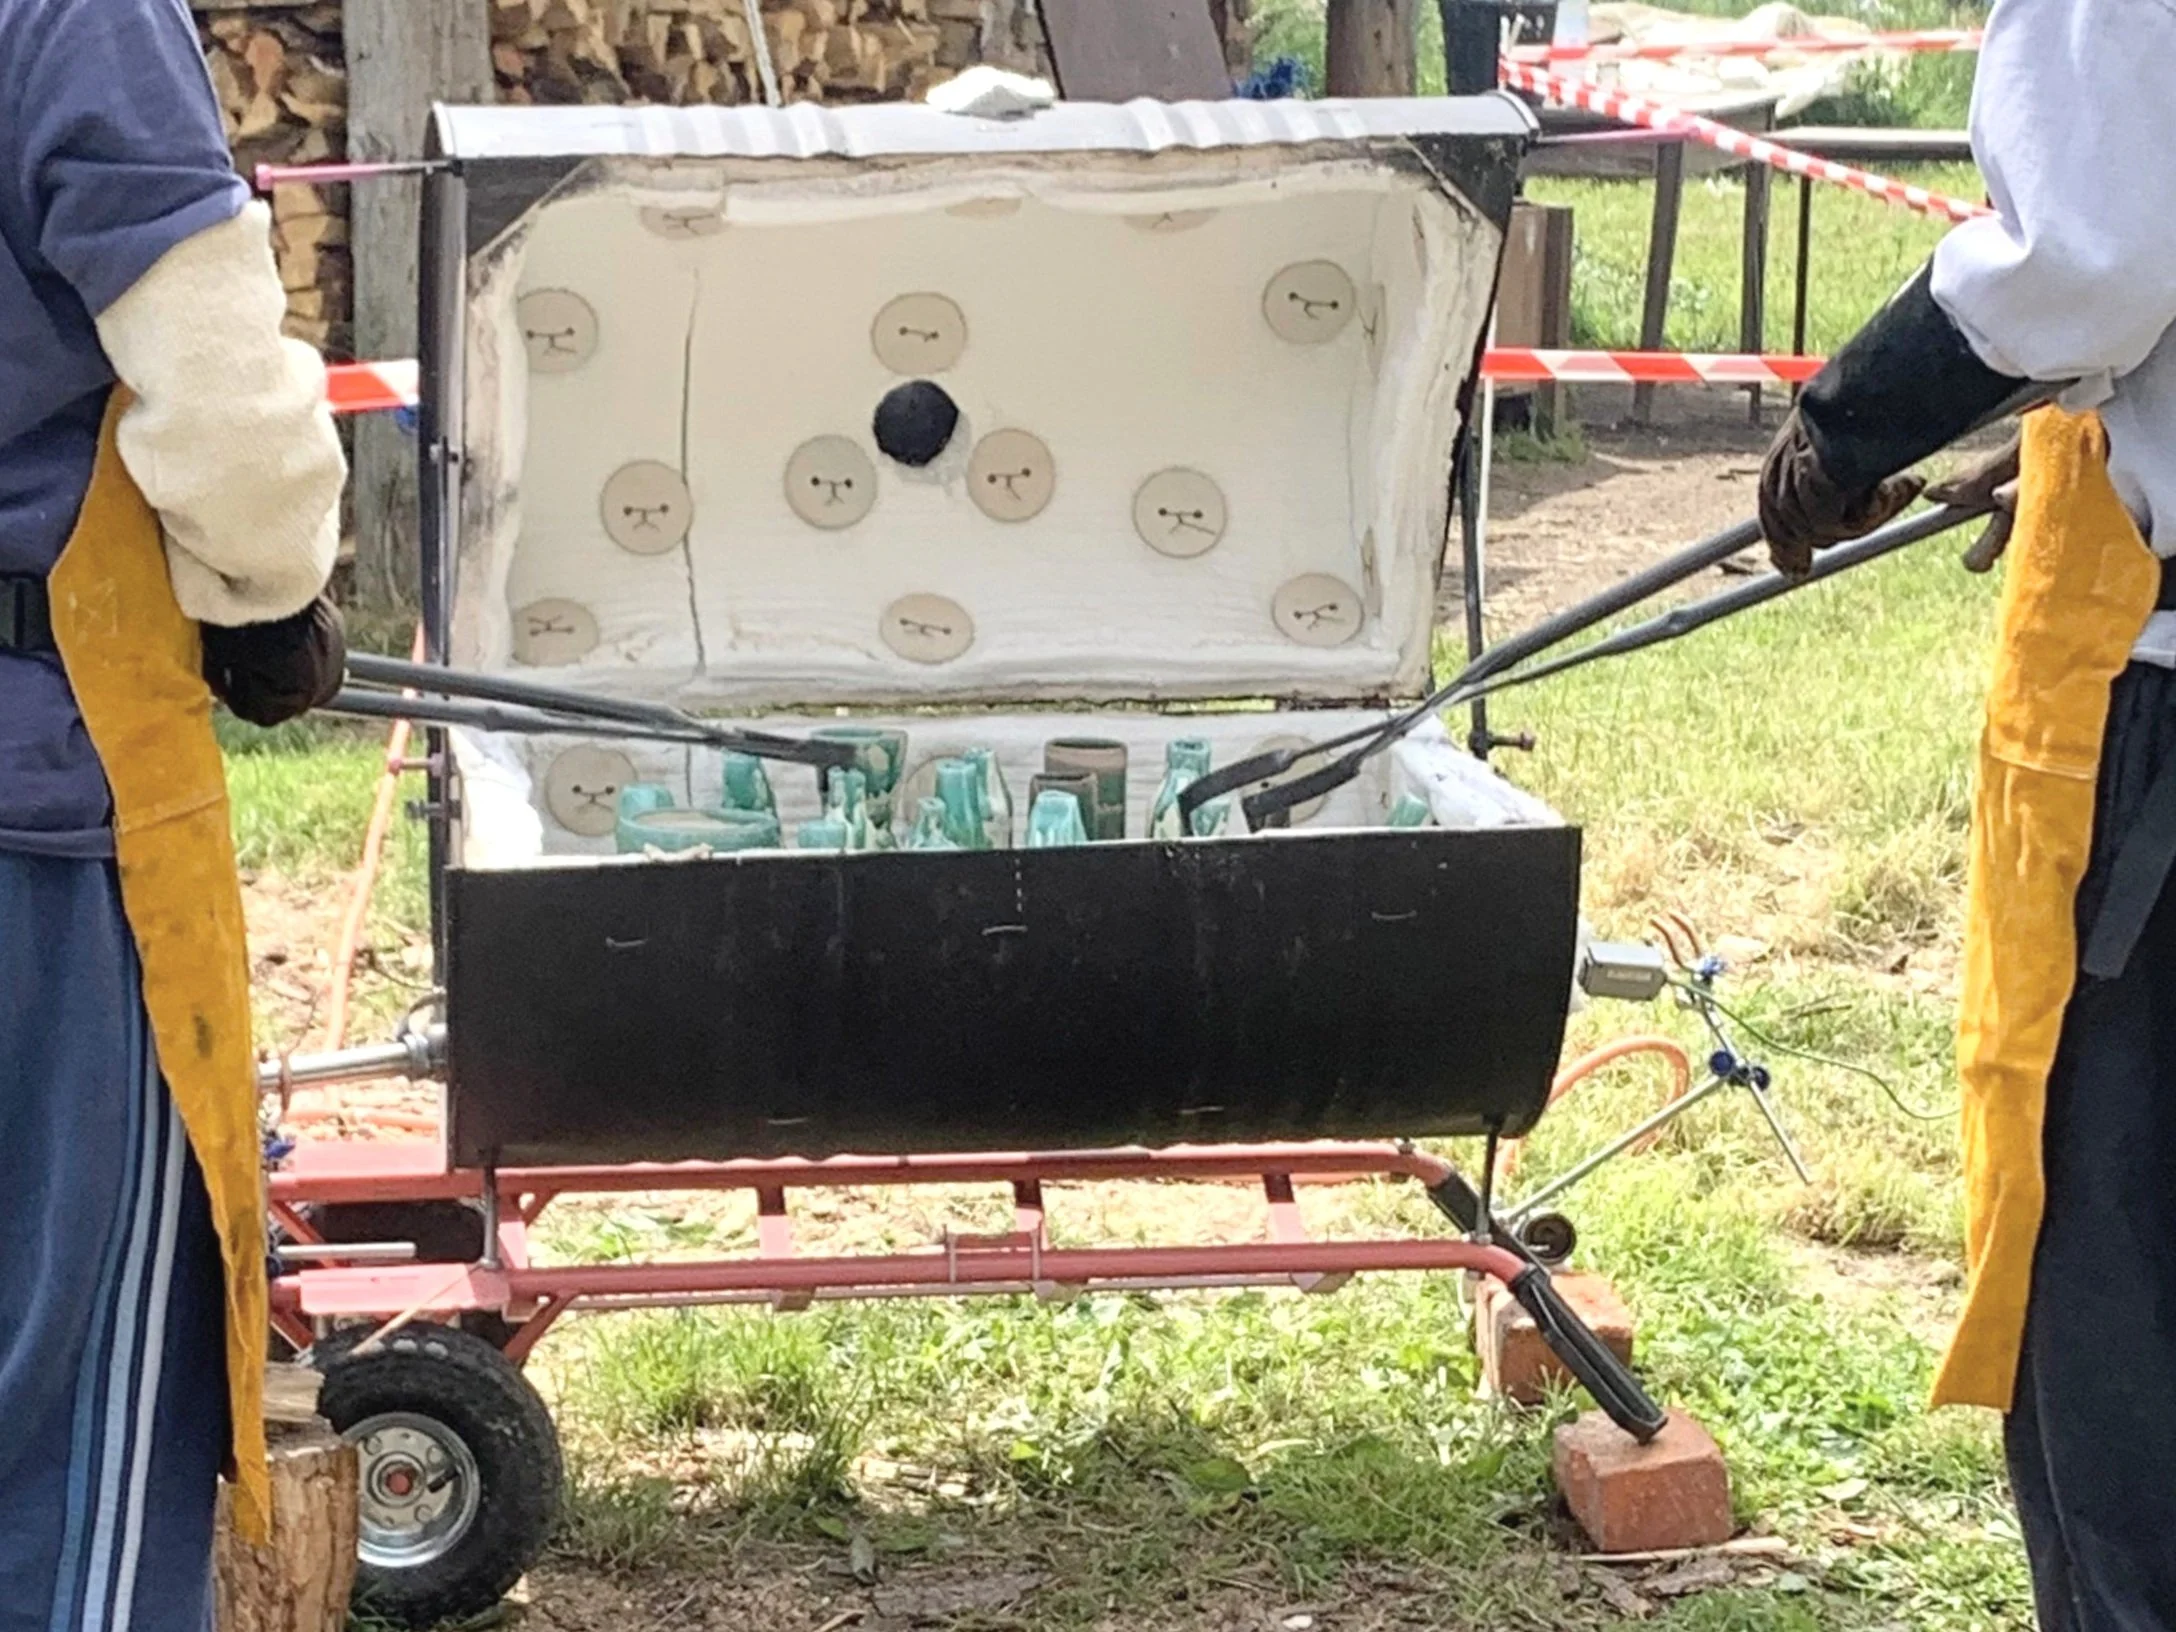
Handling the ware, glowing orange-hot and tacky with molten glaze; seeing it ignite the combustibles in the reduction bins; following the journey of the fire triangle; and viscerally experiencing what reduction really is, can be magical when seen on the faces of novice potters and ceramics students.
And so it seemed worth building a Raku kiln for the students I teach.
A couple of you asked me about the build, so I thought I’d write it up here:
Design
After a few discussions about possible designs, and considering the need to fire multiple small pieces (student work), I settled on a horizontal oil-drum design. - Durability was also a consideration here, and the solid metal skin definitely promises to hold the ceramic fibre with more stability than a wire mesh design.
Burners
I’m a firm believer in over-specing a design, so we went for 2 burners. I also like to get value for money, and buying the entire setup off the peg can be expensive, so we bought the kit/components and assembled them:
Burner kit (inc. regulator and Y splitter)
Gas bottles (the school where I work have a contract with BOC)
The long hoses allow the gas bottle to be placed away from the kiln itself, behind a cordoned area. For teaching this makes risk assessments easier to write!
NOTE: these products were available and cost effective at the time.. sorry if the links give 404 errors now..

Insulation
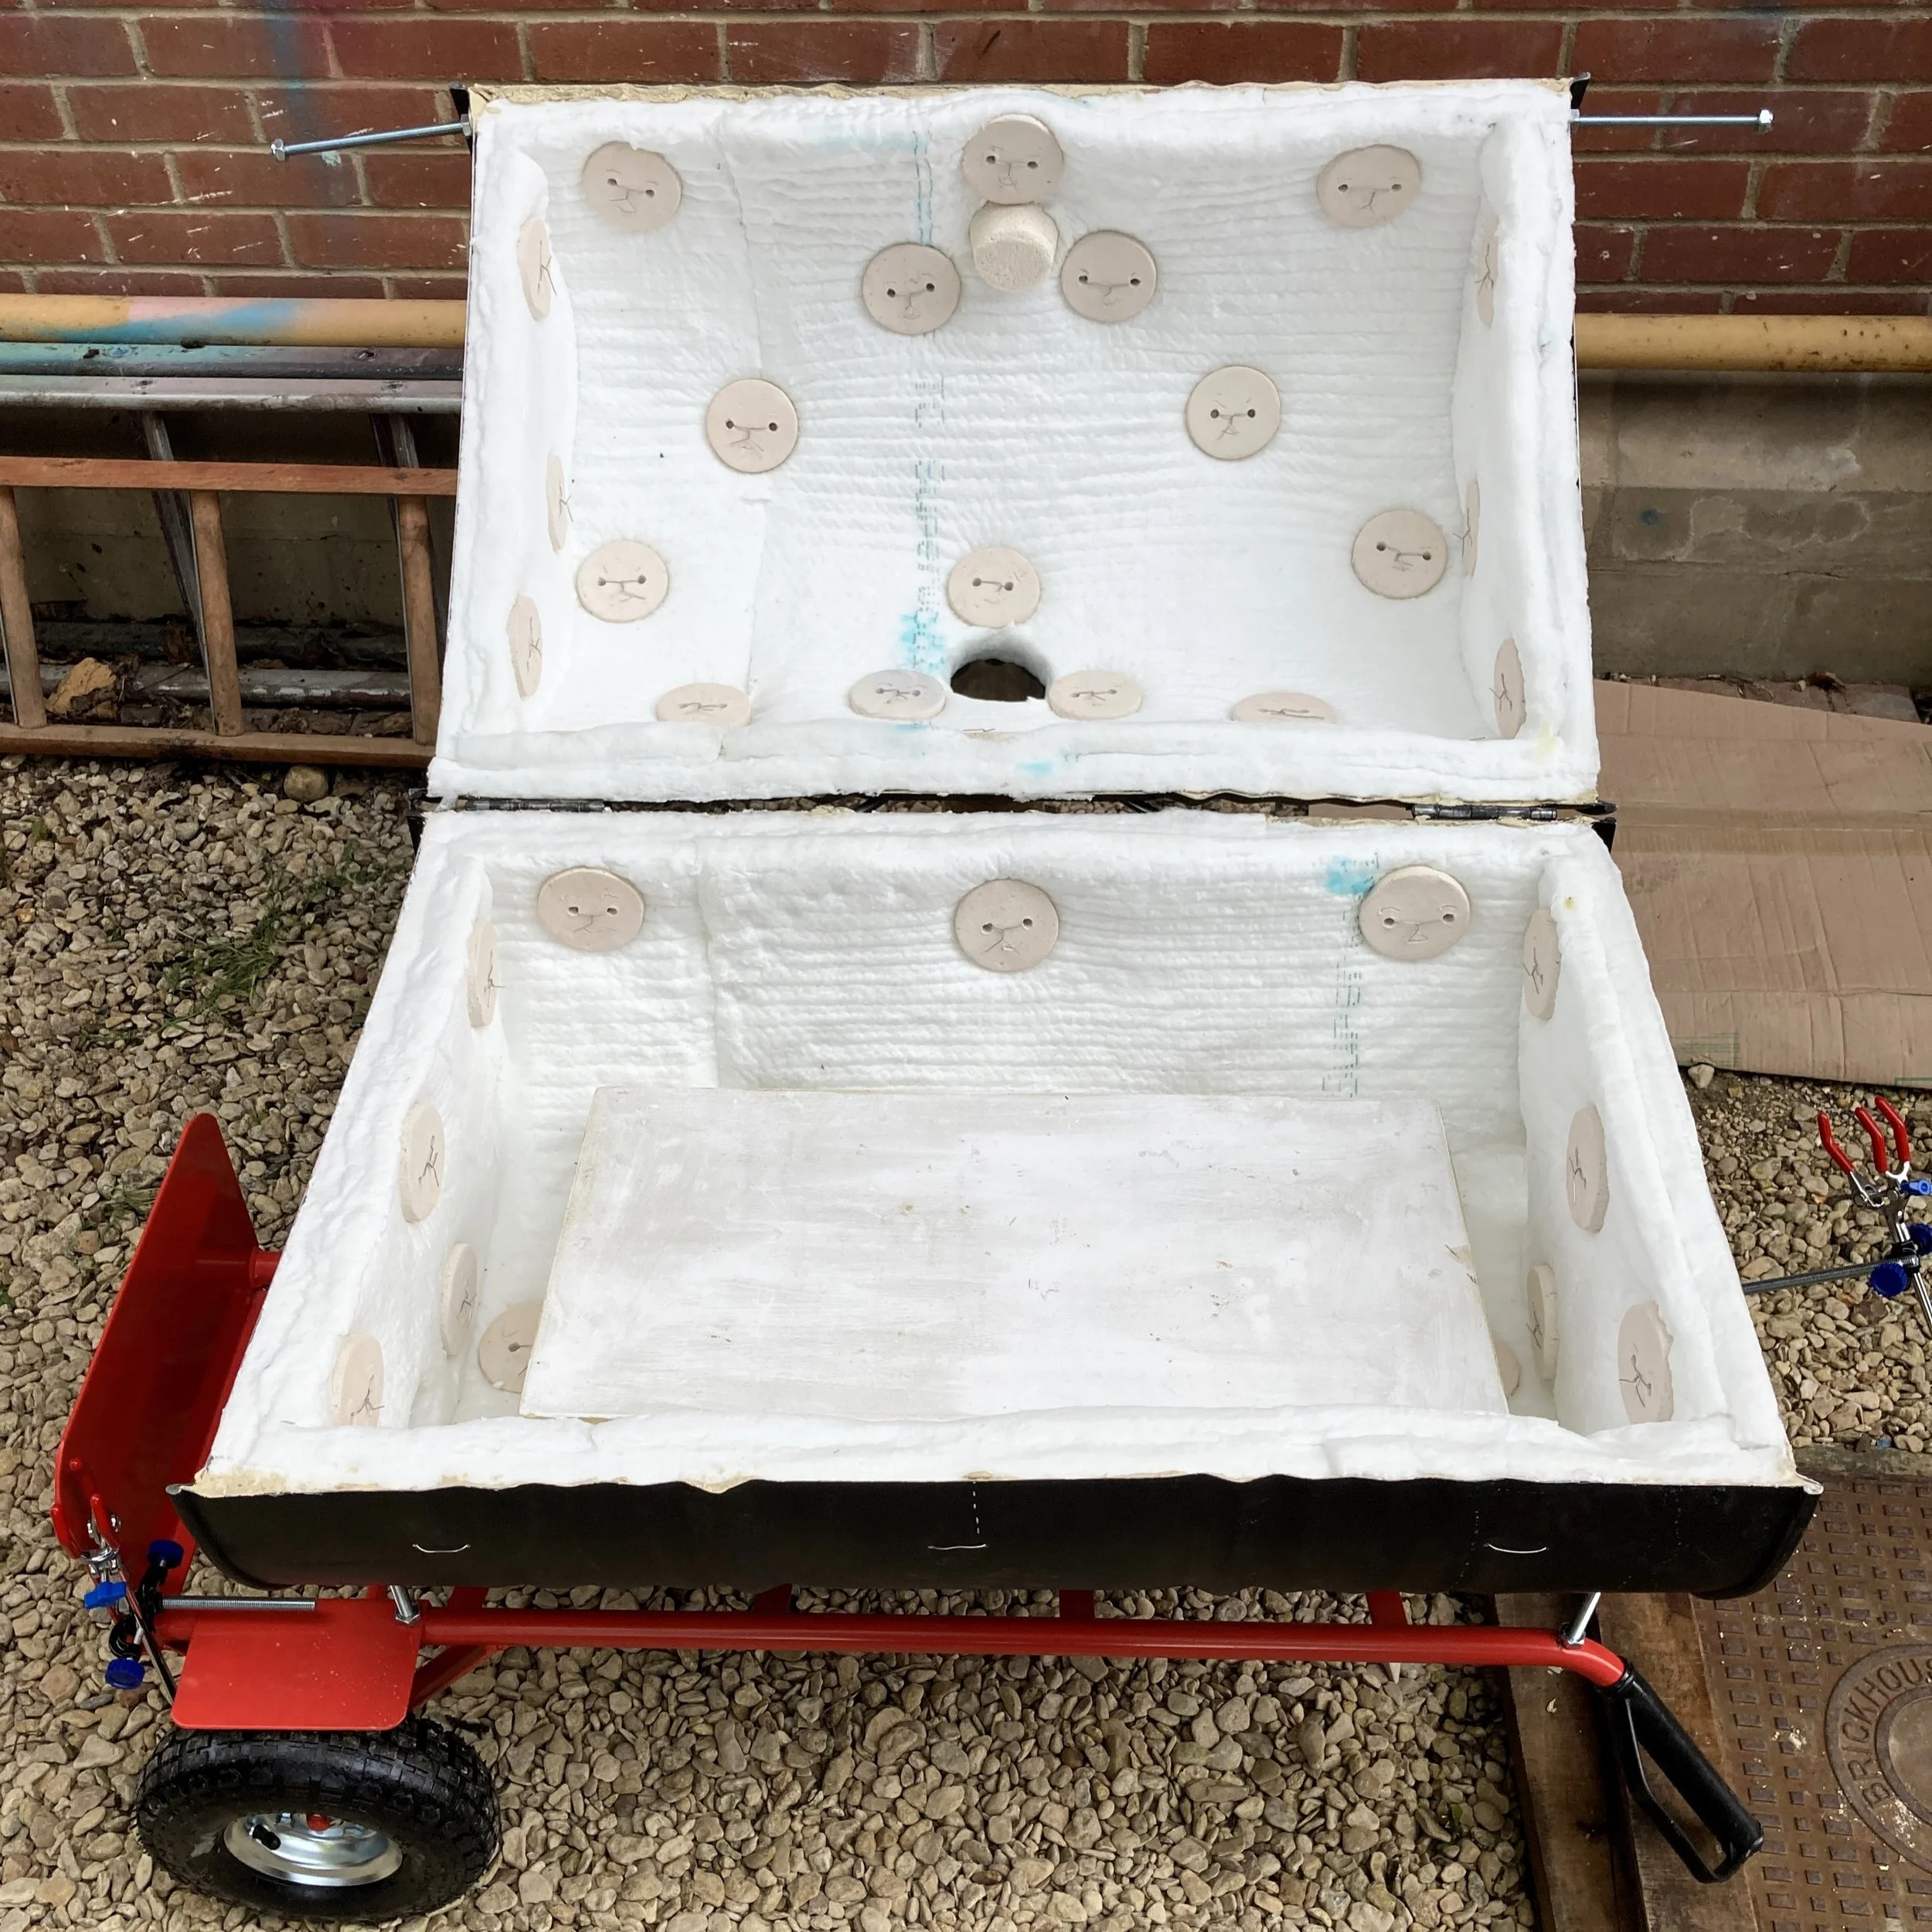
50mm thick ceramic fibre blanket is available on 10m rolls. I bought enough to line the whole of the kiln with a double layer (100mm or 4inches).
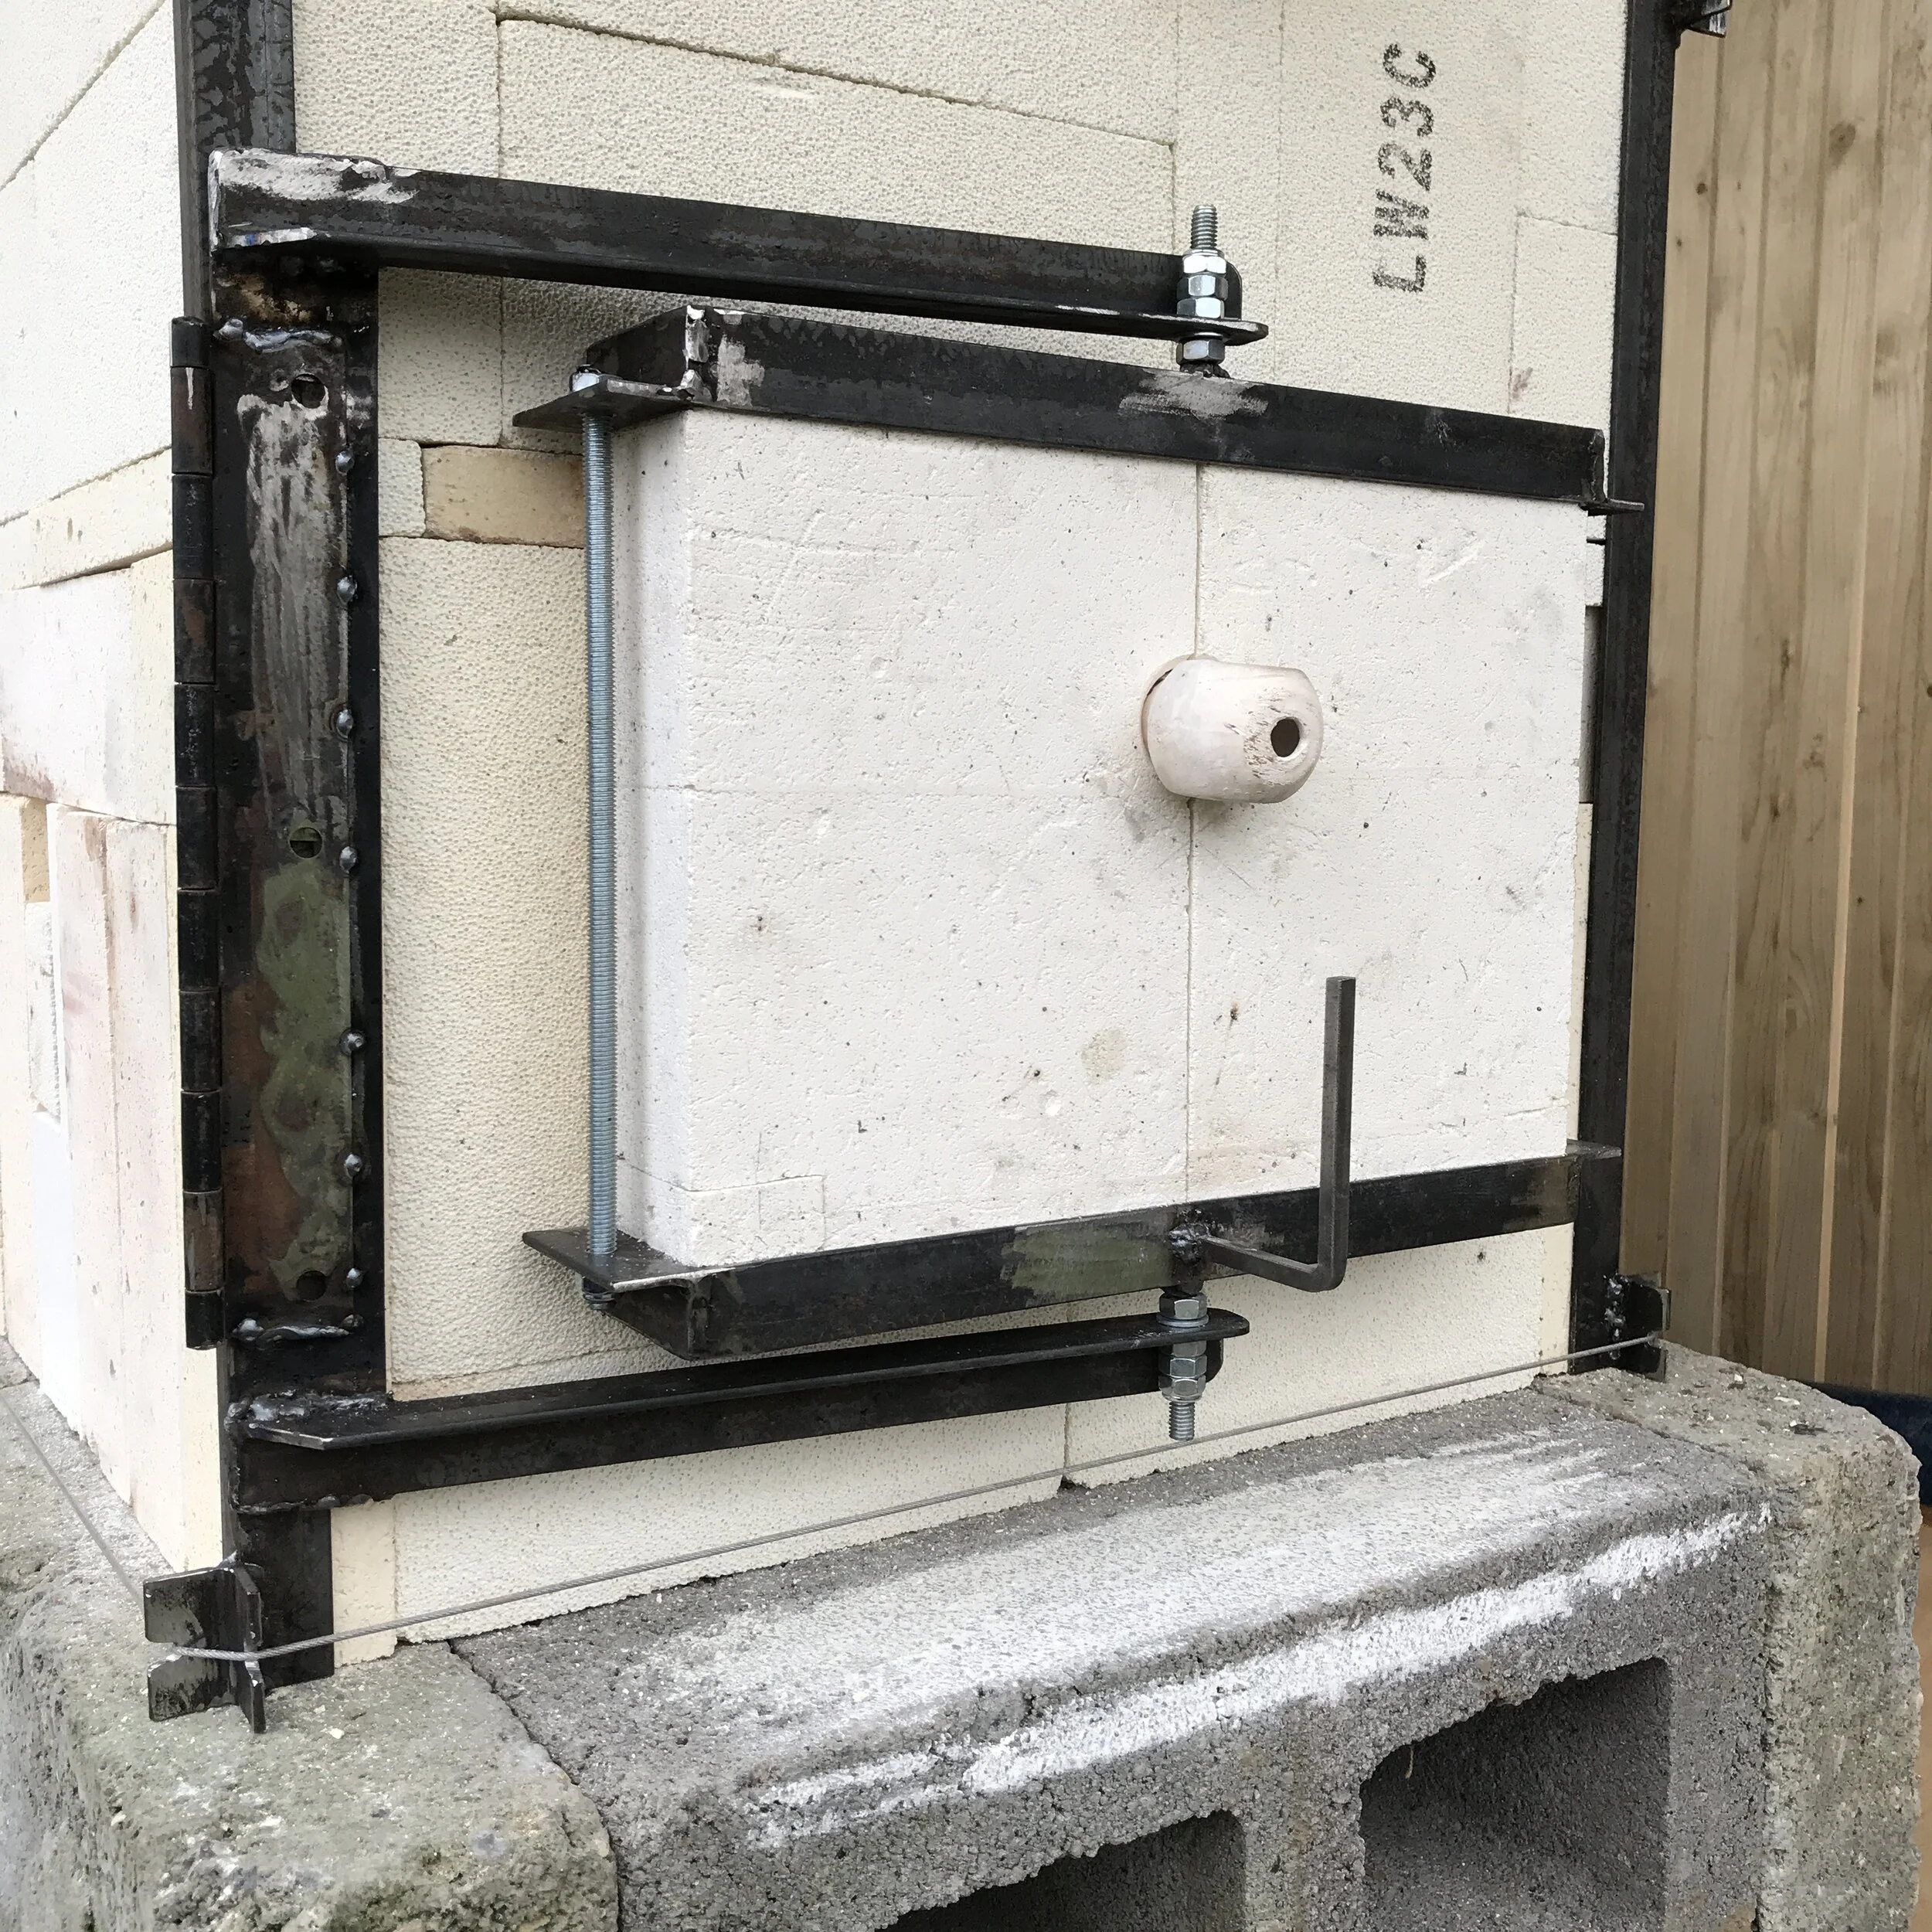
We made 40 ceramic buttons from a heavily grogged (thermal-shock resistant) clay-body rolled into a 12mm slab and cut using a metal biscuit cutter. Two holes cut in each would accommodate the nichrome wire, later, and hold the ceramic fibre in place.


Build
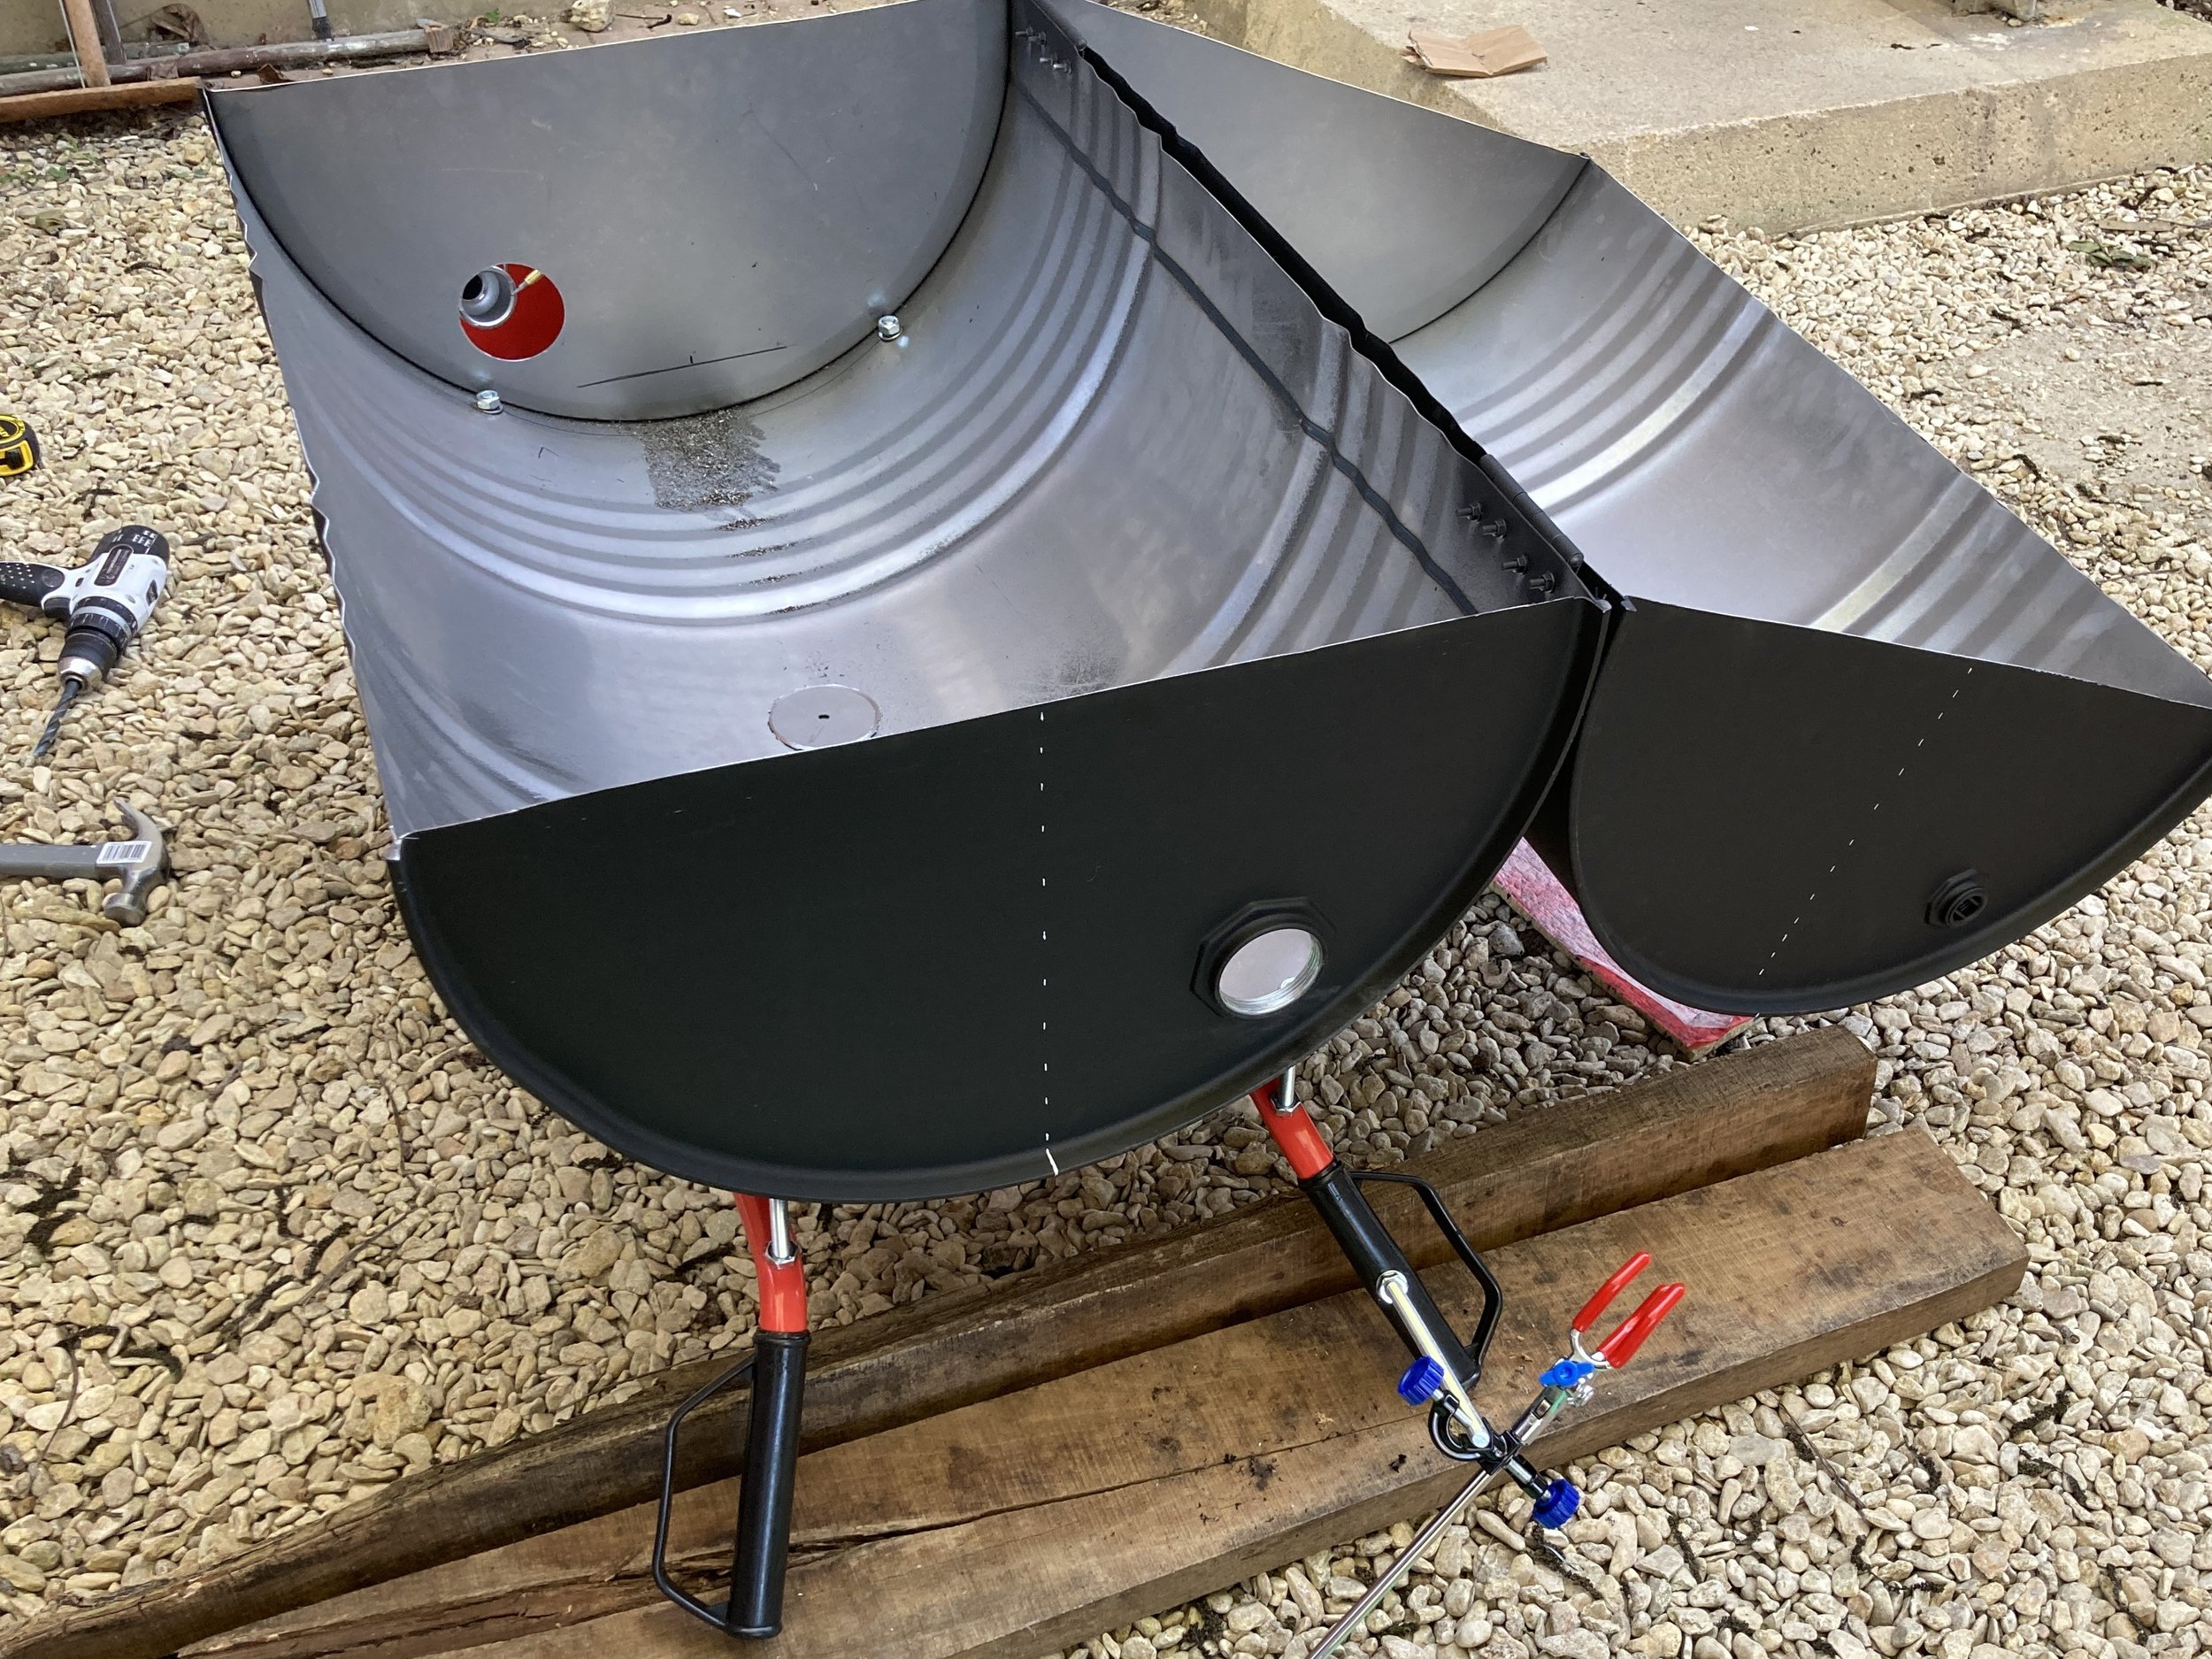
I could only find pre-used oil drums, and these came pre-painted obviously. It may have been unnecessary, but I stripped the old paint off and resprayed it with high-temperature paint. Chemical paint stripper and a wire drill-brush did the job.
Once painted, I marked out the drum for cutting using a laser-level. - one trick here is to pre-mark and drill the holes for your hinges (it’s easier when the drum is whole!). Use the threaded hole which comes on the drum for one of the burner ports, and a hole-saw to cut the same size hole at the diagonally opposite side for the other.


I’d decided to mount the whole kiln on wheels, so that setup could be a one-person job. A sack-truck seemed like an easy way of avoiding any welding, and it provided some useful anchor points for the burner mounts too.
8mm threaded rod (stud), cut to lengths and fitted with penny-washers and nuts was a way to mount the base of the kiln to the sack-truck and space it both level, and away from ground (for airflow). I used the same hardware to attach some scientific apparatus clamps at the right angles to hold the two burners. Now is a good moment to think about where your thermocouple will sit in relation to the shelf /props/ware, and drill the hole for this.
The chimney was a bit of a pain, but I found an old metal champaign tube (not mine!) which seemed about the right size. Marking the kiln lid out for cutting is not easy, as the tube presents a circular section onto the side of a cylinder: Measure, eyeball it, mark it out, and start cutting.. Cut thin pizza-wedge shaped which can then be bend upwards to form flanges or tabs onto which the tube can be fitted. I had to cut a little, then try it for fit, then cut a bit more: this incremental approach worked for me, and soon i could drill both parts and rivet the tube on. A smear of “gun-gum” (automotive exhaust sealant) around the join helped plug any gaps.
I cut a reasonable large spy-hole in the front of the lid, and shaped a scrap of IFB to make a bung. - It’s important to be able to check the glaze melt before opening the kiln.
One final addition was the lid support mechanism: two bars of steel with notches cut in the ends so that they locate on small spigots, and prop the lid open when loading/unloading.
Results
She fires like a dream, on very low gas pressure, and would almost certainly reach stoneware temperatures if left unchecked (the double layer of insulation, and twin burners mean she’s a powerful beast!).