
Ball-Mill
For some time I have been interested in the idea the Earth’s twelve(ish) most abundant minerals are precisely those which are needed for Ceramic Technology. Clay and glaze materials are hidden in plain sight, and by the ignorance and convenience engendered by a well developed and highly commercialised ceramics industry. (p18 of Michael Cardew’s ‘Pioneer Pottery’):


Much of this remains theory to even the most battle-worn, ingenious ceramists, primarily because of limited access to tools: specifically, a rock-crusher and a ball-mill.
Gladstone Engineering, Shimpo/Nidec, Peter Pugger and other sell beautifully engineered and frankly bomb-proof looking designs for around £2500 (without the jars). These mills come in various roller lengths and can take two or even three (small) porcelain milling jars at a time.


Shimpo also prodce a mill-rack which mounts directly to (some of) their wheels and employs the motor there-in to drive the mill. - Perfect in many ways, although still very expensive, and limited to just one jar per wheel. But this design set me thinking…
Many of us Makers are also Educators with limited budgets, little time, and many pupils, so any solution needs to be relatively inexpensive and enable milling multiple materials simultaneously. I have some access to machine tools and my brother kindly offered to design and 3D print any custom parts which I might need… And so it began:


After a day or so of messing about online, and doodling I purchased the following (not necessarily the cheapest, but I was getting inpatient!):
20mm ID Pillow-Block bearings x4. (to mount the rollers)
20mm OD Aluminium pipe. (for the rollers themselves)
20mm ID Foam sleave. (to add grip to the rollers)
24mm M8 Roller-balls. (to stop the jars from moving off either end of the rack)


I looked into using inline-skate wheels as the drive-wheel taking the power from the wheel-head to the mill rollers, but then my brother stepped in and offered to model and 3D print a custom wheel. He printed several small collars with different internal diameters to test the fit onto the aluminium rollers (20.2mm was best). Then he printed the 122mm external diameter wheel with a gentle radius, and a slightly randomised texture to provide extra grip. A small captive nut supports a grub-screw which allows the drive-wheel to be tightened onto the roller when in place:


And then, of course, there is the challenge of the milling jars. Traditionally, these are extremely dense and low iron porcelain, and use various metal closures, along with a rubber gasket, to create a watertight seal. They need to be straight-sided, so as not to move off the rollers, wide-mouthed, to aid loading and emptying the contents, and reasonably large capacity to hold the material, grinding-media, and water. Industrial design is not my strong point, neither am I particularly practiced in throwing large-scale, and certainly not in porcelain. I looked at Kilner-Jar closures and rubber gaskets, along with non-branded jam-jar clips, but concluded that a short length of stud, bonded into holes on the rim of the jar, and then wing-nuts to tighten, would be a simple, and slim-line option:


I have seen that some people use plastic kegs, rather than porcelain jars, and Manutan (UK) sell these watertight red-lidded versions in a range of sizes. They are brilliant as slip and glaze buckets with a totally airtight seal meaning that you can rely on virtually zero evaporation from one year to the next. But as milling jars, I can’t convince myself that they would work with materials as hard as quartz, granite and feldspar. - Surely the materials are milled between the porcelain balls and the jar wall itself? And surely the plastic drum would wear away extremely? In the end I wedged a little stoneware into a porcelain body and did my best to throw evenly…


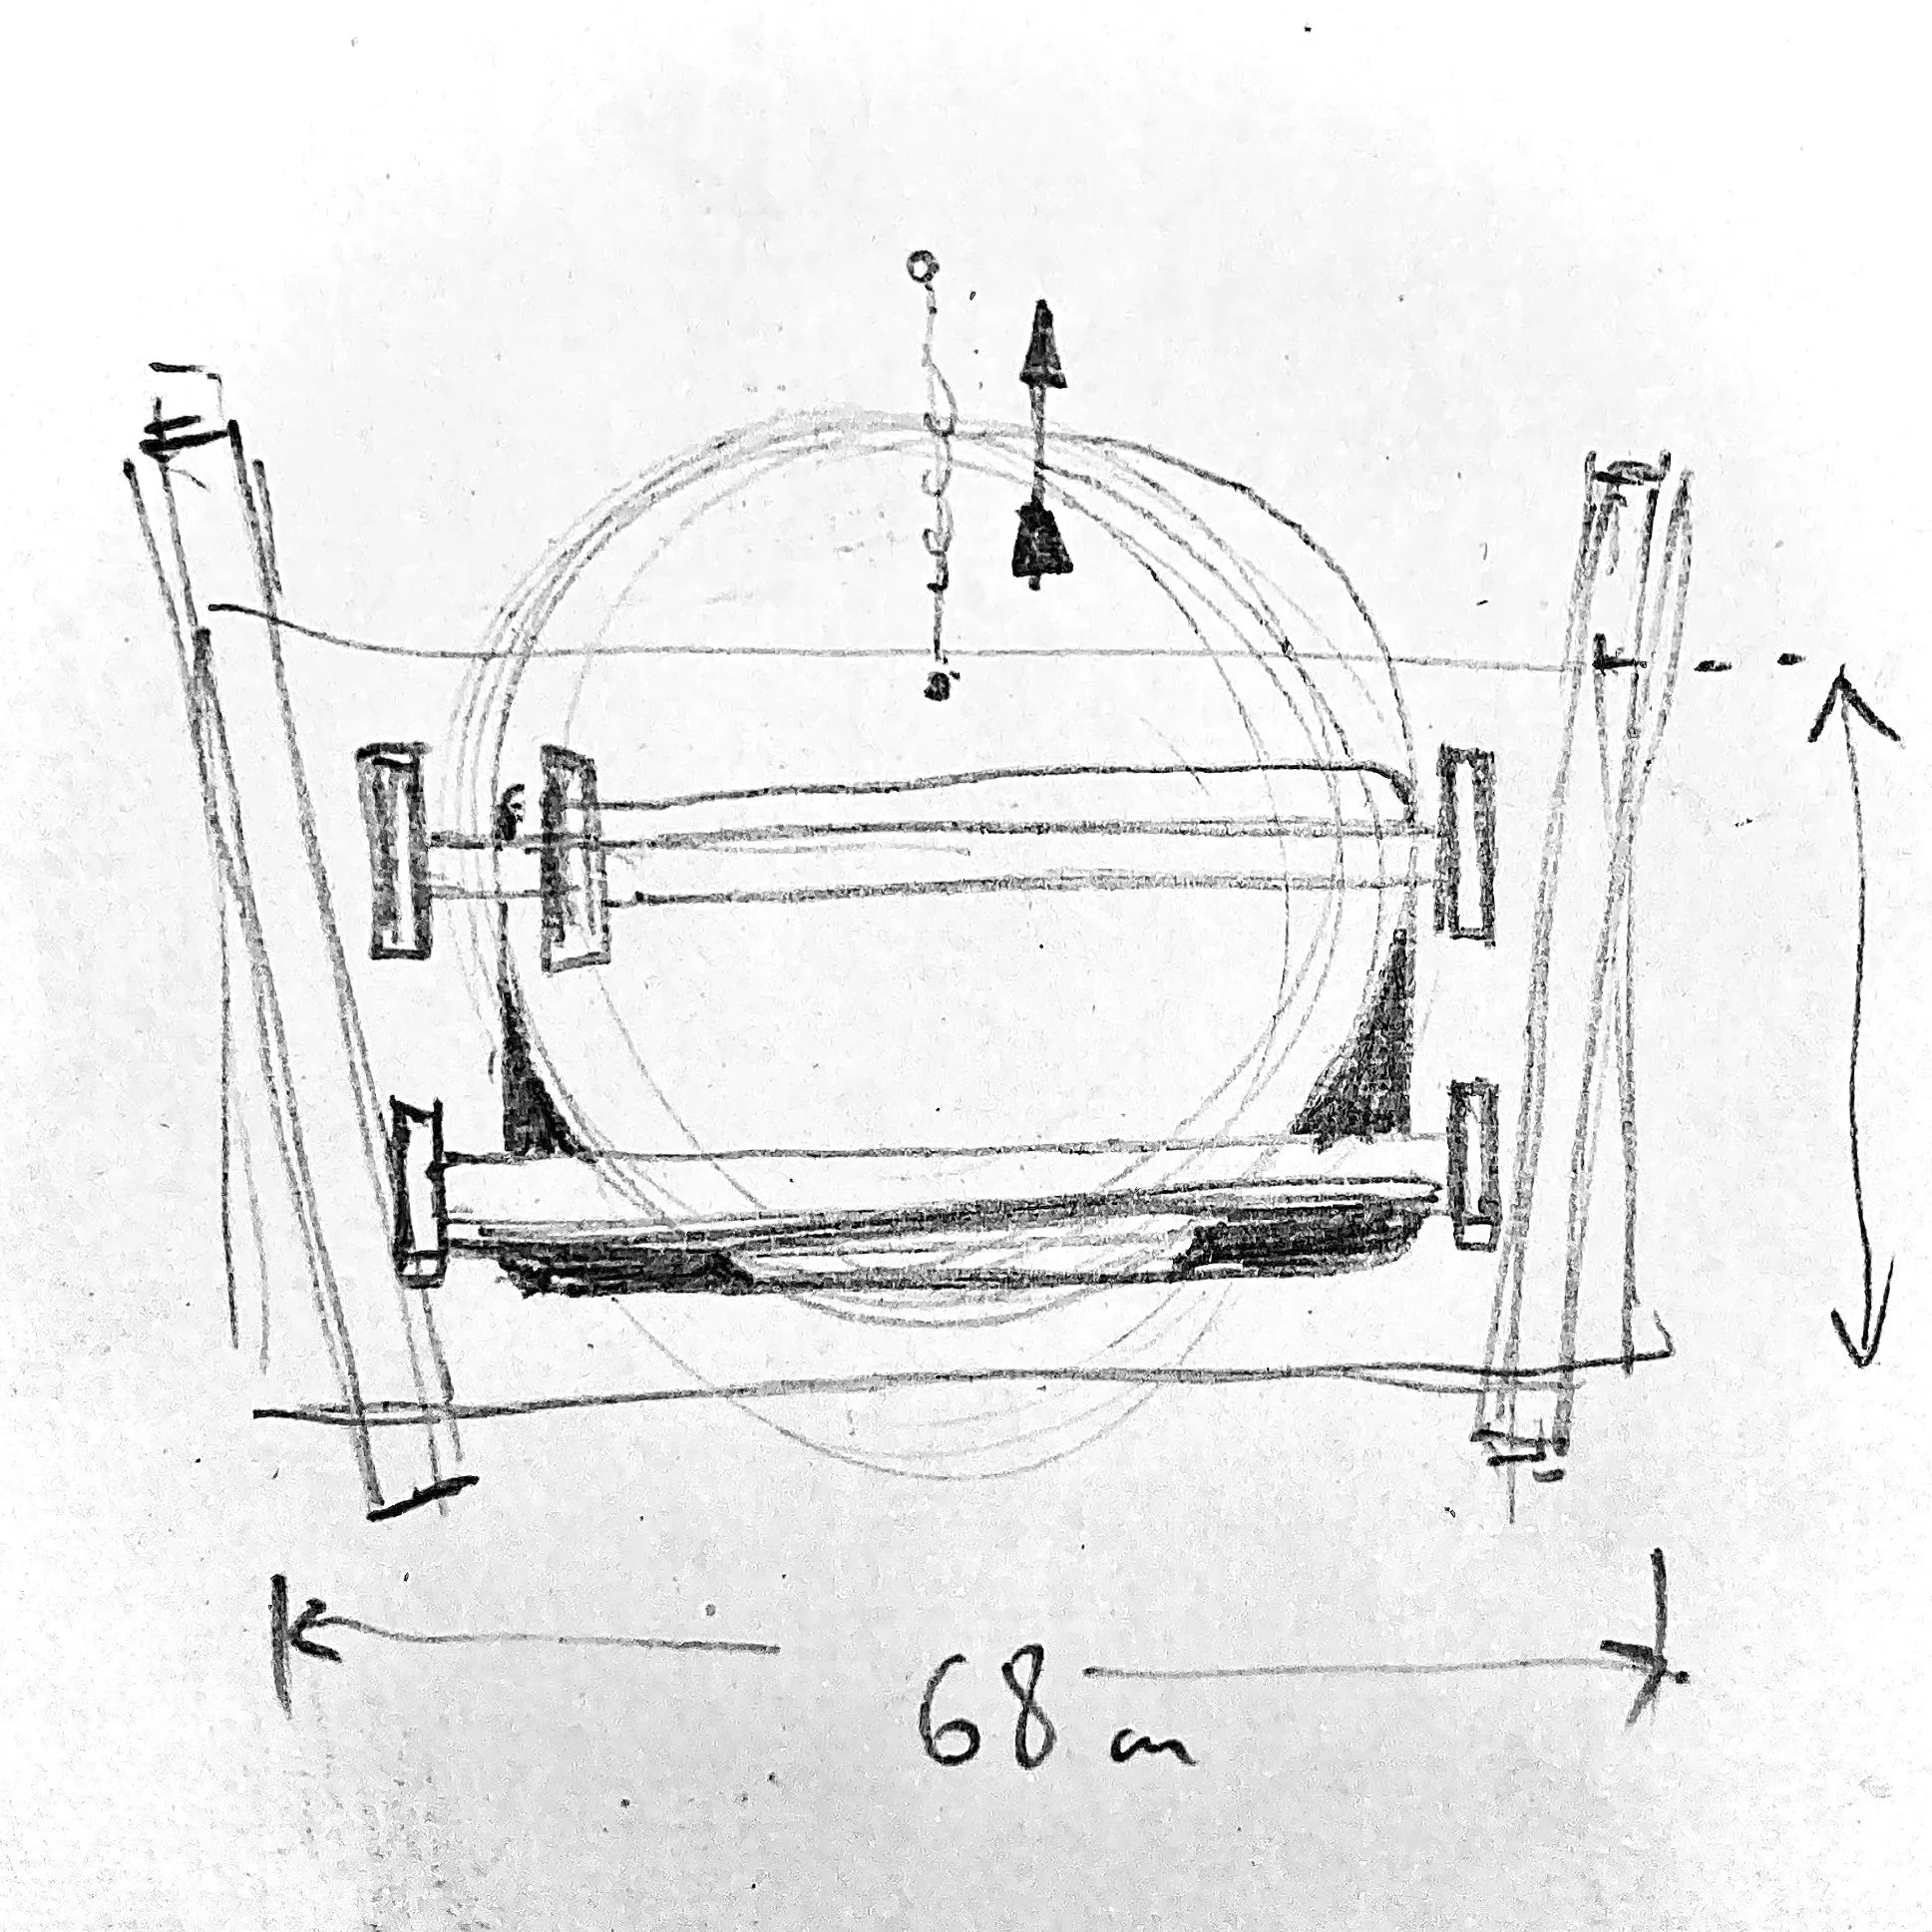
The wheels at work are large work-horse sit-on affairs; robust and beautifully made. Their fiberglass splash-trays are tapered (wide at the back, to thinner and curved at the front), and I have already fitted simple tool-boards to the back of each. Using off-cuts of 18mm plywood I cut the base boards, and attached smaller pieces of the same ply to the back of each base board to act as a cleat and lock the board in place into the taper of the splash-tray. I then began to mark out the positions of the bearing blocks and attach these.
NOTE: I could have used a wider base board (if I had had more plywood) and used longer rollers which would have, in turn, allowed me more space for milling-jars on the rack. With hindsight, this would have been a better idea, though it may also have placed more load on the drive-wheel leading to slippage in the system… who knows..


While waiting for the first of probably 6 milling-jars to slowly dry, I got on with bonding some old roofing-rubber to the tops of 3 new plywood batts. These will reduce the diameter of the drive-wheel, and also provide better traction/grip between the wheel and the drive-wheel which powers the roller. I also cut the slot which the drive-wheel will sit down into, and fixed a 90degree ‘L’ bracket to the base-board, onto which I will attach a ball-roller to act as an end-stop for the milling-jar(s).


I messed about with some ball moulds which are designed for making spherical ice-cubes (ice-balls?), to see if they’d be any quicker/better for forming the porcelain grinding media. Turns out that it’s probably just as quick to hand roll them given that they certainly don’t have to be perfect spheres (some people just use quartz pebbles from the beach!).
Amazingly, everything survived the high firing (1300c), and there was zero warping evident in the milling jar. I fired the porcelain balls in a bed of calcined alumina, and I fired the jar with the lid in place. It required a few sharp taps with a wooden mallet to release the lid from the body and, if anything, the lid may even have slumped slightly to the gentle undulation of the jar’s rim, making it fit even more closely.


Who knows if 18 large balls and 20 small are sufficient (if you have experience here please do get in touch!) to mill efficiently, but I will need to make more for the other jars when I scale this project up to 3 racks and 6 jars for teaching purposes.
The washers and stud all fit nicely now that the (probably 13%) shrinkage has taken effect, so I set about bonding the stud into the holes using an epoxy-resin adhesive, and cutting the rubber gasket from a paper template. - And I couldn’t resist giving it a quick spin once the epoxy had gripped!
I’m keen to get the first round of testing done, where I plan to examine how the particle-size of a given glaze material impacts on the melt: Same weight of material taken to the same temperature, but ground in increasing 3hr intervals. This test might then act as an indicator for the processing of any future materials.
I'll be sure to post the results here, and on Instagram but do get in touch with any tips or questions. Thanks for reading this far!


